A sharp P can land like a thump in an otherwise clean podcast intro, training video, or vocal take. Those bursts of air are called plosives, and a well placed pop filter can help keep them from reaching the microphone.
Choosing one gets tricky when you’re working around a boom arm, a monitor, or a microphone with controls you need to reach. A filter can look right on paper and still leave you with nowhere to attach it.
We researched the market and compared stand mounted screens, filters that attach to the mic, and foam shields before choosing these five. Our picks help you match the filter to the space you have, the mic you use, and what you record most often.
How We Selected the Best Microphone Pop Filters
We started with the hardware you’d have to fit the filter around. We checked manufacturer specifications and exact product listings for mounting options, fit ranges, and screen materials. Where a brand published setup or care instructions, we used those to understand what regular use would involve.
We also drew on recording guidance to assess how much control each design gives you over screen placement. That matters if you switch between speaking and singing or share a recording station with someone else.
- Mounting fit: Check where the filter attaches so you can tell whether it’ll work with the stand, boom, or microphone you already own.
- Screen placement: Look for enough adjustment to put the screen in front of the mic from your usual recording position.
- Desk space: Consider what the filter and its mount will occupy near your monitor, script, or camera.
- Screen design: Look at what sits in front of the mic and whether the design suits the kind of recording you do.
- Cleaning: Check the care instructions if the filter will see daily use or be shared by several speakers.
Each pick earns its place by serving a distinct recording setup. Start with the one that most closely matches yours.
Best Microphone Pop Filters for Clear Vocals
A good place to start is where you’d attach the filter.
1. NEEWER Professional Microphone Pop Filter Shield
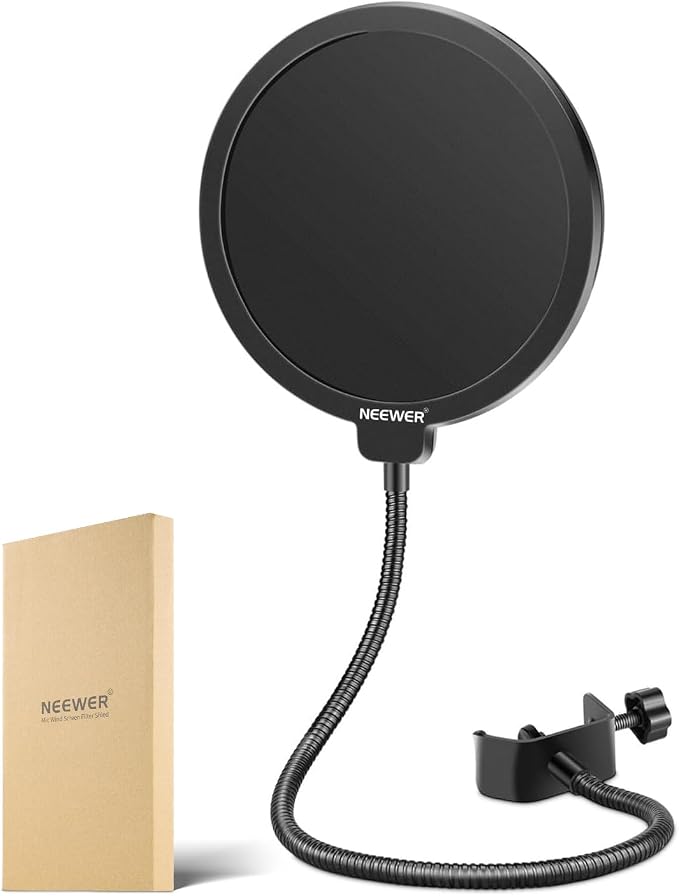
We’d start with the NEEWER Professional Microphone Pop Filter Shield for solo podcasters and small business owners who record training videos or voiceovers at a desk. Its stand mounted design gives you a separate screen you can add to a tubular microphone stand or boom.
NEEWER’s two screen layers do different jobs. The first catches the initial burst of air, while the gap gives that air room to spread before it reaches the second. That’s the part of the design that matters when a hard P lands like a thump.
The steel gooseneck lets you adjust the angle and distance of the screen independently of the mic. That’s handy if you record seated most days but stand for longer reads. You can move the screen to suit the new position without shifting the clamp.
The swivel mount gives you another point of adjustment, but the screw clamp still needs a place to grip the tubing. We’d check the area near the end of your boom, especially if a shock mount already occupies the spot you’d use.
Once the clamp is secure, bring the screen between you and the microphone. RØDE’s placement guidance suggests starting about two inches from the mic for a separate screen. Read a line with several P and B sounds at your normal recording volume before adjusting further.
Who should skip it:
- Skip it if your stand has no exposed tube where the clamp can sit securely within reach of the mic.
- Choose a different mount if you want the screen to travel with the microphone body whenever you reposition it.
2. PEMOTech Upgraded Three Layer Pop Filter
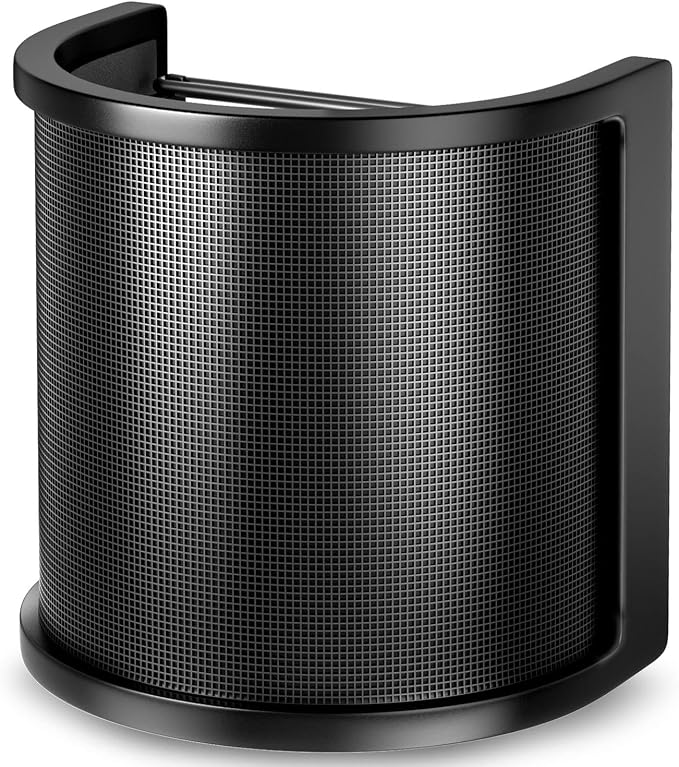
The PEMOTech Upgraded Three Layer Pop Filter fits directly onto compatible microphones, which makes it a practical choice for creators recording product demos or short videos at a crowded desk. We’d put it on the shortlist for a setup with an Audio-Technica AT2020.
The screen combines metal mesh, foam, and a fabric called etamine. Together they form a barrier in front of the grille that helps soften bursts of air from speech. We’d judge the filter by how it handles your voice at your usual speaking distance.
The elastic bands and inner rubber ring secure the frame to the microphone. Since the filter goes where the microphone goes, you can swing the mic toward you for a quick narration and keep the screen in place when you move the mic back.
That convenience depends on the fit. The listing gives a body diameter range of 45 to 61 mm and specifically excludes the Blue Yeti. We’d measure where the band will sit, especially if the grille is wider than the body or the shape changes.
Seat the inner rubber ring against the body and secure the bands with the screen in front of the side you speak into. If you use a shock mount, check that its frame and the filter have room to sit without pressing against each other.
Who should skip it:
- If you use a Blue Yeti or switch between one and another mic, choose a filter that fits both.
- Skip it if the part of your microphone that would hold the bands falls outside the stated diameter range.
3. Penypeal Microphone Wind Shield Pop Filter Isolation Ball
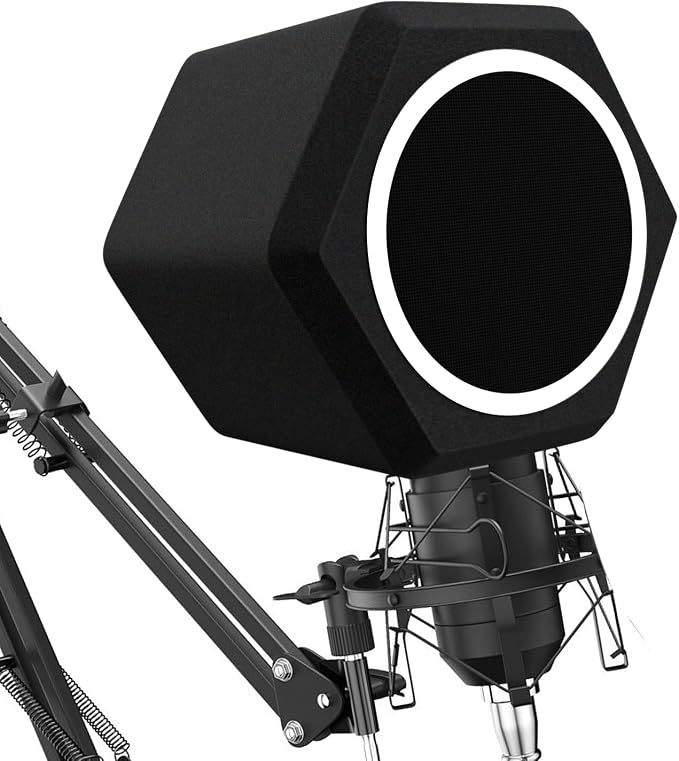
The Penypeal Microphone Wind Shield Pop Filter Isolation Ball is the one we’d consider for home studio singers or voice actors who want to try a foam shield around a compatible condenser mic. A separate front screen handles breath bursts as you sing or speak.
The seller’s listing shows foam on five sides, with a two layer pop screen at the opening. That puts the screen between your mouth and the capsule while placing absorbent material around the microphone, close to where it picks up your voice.
The kit includes a holder for different microphone sizes. We’d start by checking the seller’s advertised fit range of 50 to 75 mm and looking at your mic’s shape and controls. The microphone sits inside the foam and needs to face the opening.
Penypeal describes the foam as a way to reduce reflections. We couldn’t verify how much this model reduces them. Material close to a capsule can affect vocal tone, so we’d listen for changes beyond the reduction in popping.
After checking the fit, face the microphone’s pickup side toward the front screen. Record the same line with and without the ball, keeping the distance and input level steady. Listen to the overall tone of your voice as well as how the consonants sound.
Who should skip it:
- Skip it if the microphone body falls outside the seller’s stated diameter range.
- Choose an open screen if you need frequent access to controls the foam would cover.
- If persistent background noise is the main problem, start with a quieter recording spot before buying a shield.
4. Stedman PS101 V1 Pop Filter
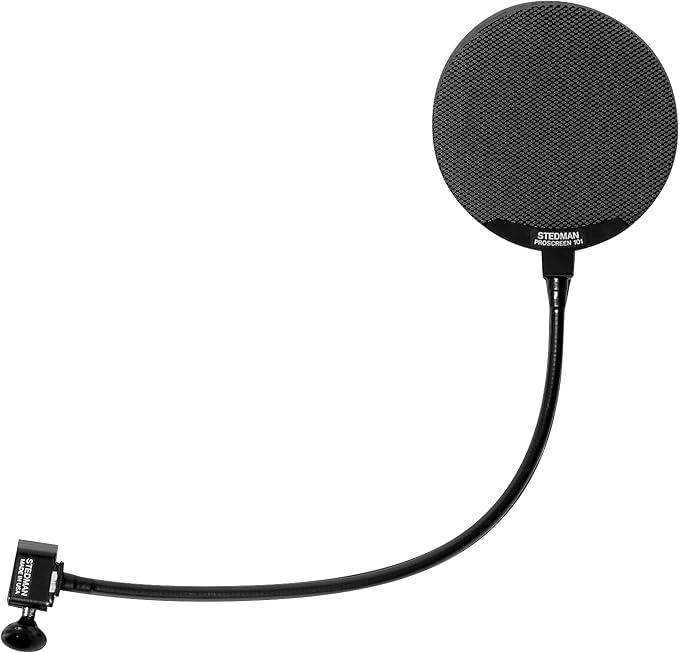
We’d pick the Stedman PS101 V1 for voiceover artists and small studios that record often on a dedicated mic stand. Its 4.6 inch screen is metal, and Stedman provides clear care instructions if you want to clean the filter between sessions.
Stedman says the shaped metal openings direct the burst of air downward, away from the microphone capsule. That matters if you record close to the mic and want to keep the same speaking position through a read, even when a line has several strong consonants.
The 13 inch gooseneck lets you position the screen independently of the mic, and the clamp has a soft nylon tip where it contacts the stand. Stedman’s cleaning directions call for mild detergent, a warm water rinse, and time for the screen to air dry.
Measure the stand where you’ll mount it. The original clamp fits diameters from 0.5 to 0.85 inches, so a thick boom can rule it out even if there’s plenty of space in front of the mic. That range applies to this V1 model.
Follow Stedman’s screen placement guidance and keep the label facing the performer, with at least two inches between the screen and microphone. If you share the setup, that gives everyone a consistent starting point before they adjust for their own speaking or singing position.
Who should skip it:
- Skip this version if your preferred mounting point measures outside the standard clamp’s 0.5 to 0.85 inch range.
- Choose a different mounting style if you need the screen to attach directly to the microphone or its shock mount.
5. HyperX Shield Microphone Pop Filter
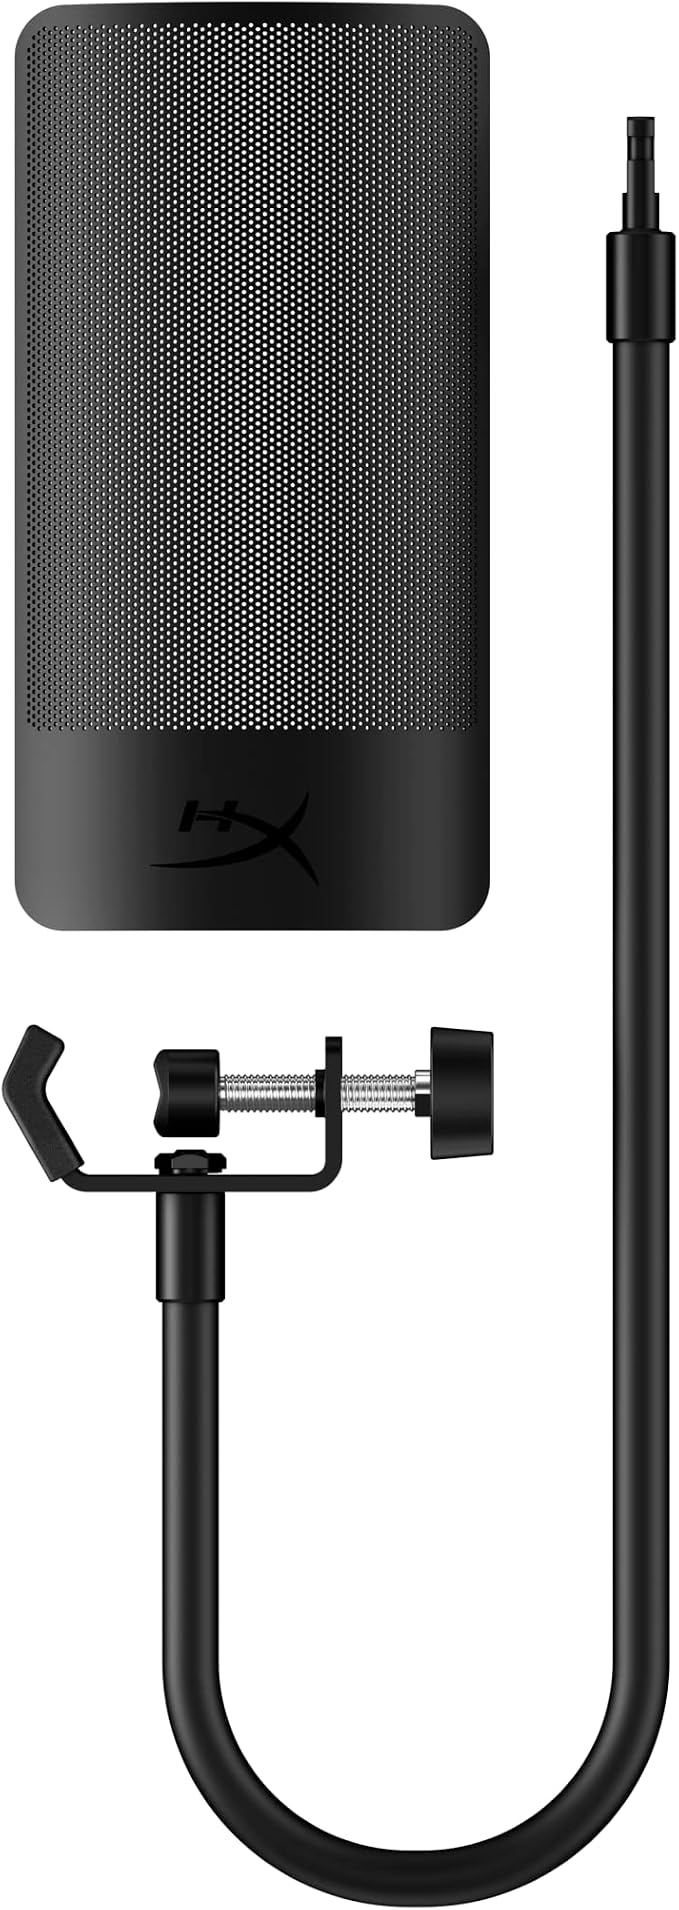
The HyperX Shield Microphone Pop Filter is the pick we’d make for streamers or creators who use a HyperX QuadCast, QuadCast S, or ProCast. Its screen attaches directly to those models’ shock mounts, a useful option when space around the mic is tight.
HyperX uses metal mesh that resists corrosion. The mesh helps temper the puff of air that can reach the capsule when you hit a hard consonant. HyperX also describes it as easy to clean, which matters if your mic sees daily use.
For stand mounting, the Shield comes with a flexible gooseneck covered in silicone and a padded clamp for the stand. You can set the screen where it suits your speaking position, with a rubber pad between the clamp and the stand.
Direct attachment depends on the shock mount. HyperX names three models for that option, so we’d check the exact model before assuming another HyperX mic mounts the same way. If you’re using the clamp, check for a spot where it can grip securely.
For a supported shock mount, detach the gooseneck and attach the screen directly as HyperX describes. For the clamp setup, flex the arm until the mesh sits between your mouth and the mic. Check your camera framing before going live.
Who should skip it:
- Skip it if your buying decision depends on direct attachment to a shock mount HyperX hasn’t listed.
- Choose a different mount if your stand has nowhere for the padded clamp to grip and direct attachment doesn’t apply.
Microphone Pop Filters Compared
Use the mounting details to narrow the list before comparing the screens.
| Product | Best for | Screen design | Main fit limitation |
|---|---|---|---|
| NEEWER Professional Microphone Pop Filter Shield | Desk podcasts and voiceovers | Two layers with an air gap | Needs exposed stand or boom tubing |
| PEMOTech Upgraded Three Layer Pop Filter | Crowded desks with compatible mics | Mesh, foam, and fabric | Fits 45 to 61 mm, excludes Blue Yeti |
| Penypeal Microphone Wind Shield Pop Filter Isolation Ball | Home vocals with compatible condenser mics | Five sided foam and front screen | Advertised fit of 50 to 75 mm |
| Stedman PS101 V1 Pop Filter | Frequent voiceover sessions | 4.6 inch directional metal screen | Clamp fits 0.5 to 0.85 inches |
| HyperX Shield Microphone Pop Filter | QuadCast, QuadCast S, and ProCast users | Metal mesh that resists corrosion | Direct fit limited to supported mounts |
Final Thoughts
We’d start with a short recording at your usual speaking or singing volume. Listen back for the consonants that jump out, then look at the space around your microphone. That gives you a concrete problem to solve and a clear place to measure.
From there, choose what fits your budget, your desk, and the way you work. Once it’s in place, record the same line again and listen back before you settle on a position.
Be First to Comment