A microphone on a tabletop stand can take up the exact spot where you need your keyboard, notes, or drawing tablet. A boom arm moves the mic off that patch of desk and lets you bring it closer when it’s time to speak.
The tricky part is getting the arm to fit the desk and the mic at the same time. A clamp can open wide enough for the desktop yet have nowhere to grip underneath. And an arm with plenty of reach can still swing across your monitor.
We researched the market, compared mounting options and manufacturer specifications, and selected five arms for different desk setups. Our picks will help you work out what fits your space, what supports your mic, and which features you’ll use once the arm is installed.
How We Selected the Best Microphone Boom Arms
We started with the two things that can rule out an arm straight away. It has to attach where you need it, and it has to carry the mic and mount you plan to use. We checked both against the published specifications.
Then we compared how the arms move, where they can sit between sessions, and what comes with each model. That helped us judge which options made sense for a shared office desk, a video setup, or a dedicated recording station.
- Desk fit matters because the clamp needs room to grip above and below the desktop.
- Working reach helps you tell whether the mic can reach your seat from the available mounting spot.
- Load range shows whether the arm can carry your microphone and the hardware attached to it.
- Mounting threads tell you whether your mic or shock mount needs an adapter.
- Arm profile affects whether the boom will cross your screen or fit beneath it.
- Cable routing helps keep the lead clear as you move the mic.
Each pick addresses a different setup problem. Start with the one that sounds most like yours.
Best Microphone Boom Arms for Desk Setups
From a desk that doubles as a recording space to a dedicated podcast station, here’s where each arm fits.
1. InnoGear MU01 Microphone Boom Arm
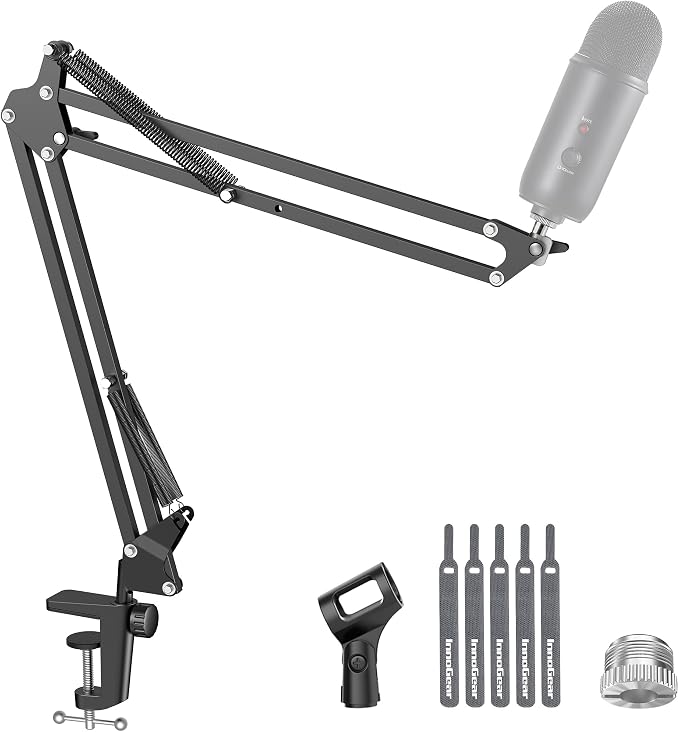
We’d pick the black InnoGear MU01 for a home office that doubles as a recording space. Its steel arm folds for storage and swivels at the base. That gives you a way to park the mic beside your screen when you need your desk back.
InnoGear gives the arm a 3.3 pound capacity. That figure matters most if you’re adding a shock mount, the holder that helps isolate the mic from vibration. We’d weigh the microphone and the hardware it will hang from before deciding whether the MU01 fits.
The included mounting hardware includes a clip for handheld mics such as the Shure SM58 and an adapter for threaded models such as the Blue Yeti. That choice is useful if your office already has a mic and you want to keep using it.
The padded desk clamp gives the arm a cushioned contact point, and InnoGear includes ties to secure the mic cable along the steel frame. We like that combination for a desk where the arm gets moved often and a loose lead could drape across your work.
The main constraint is the desk edge. The manufacturer’s listing calls for a flat, square edge up to 2 inches thick. Measure the spot you’ll actually use, especially if the back of the desk has a raised lip or a different shape from the sides.
Who should skip it
- Your only open mounting spot has a rounded or sloped edge, or the desktop is thicker than 2 inches there.
- Your microphone and mount together exceed 3.3 pounds, or you need a kit that comes with a shock mount.
2. TONOR T20 Microphone Arm Stand
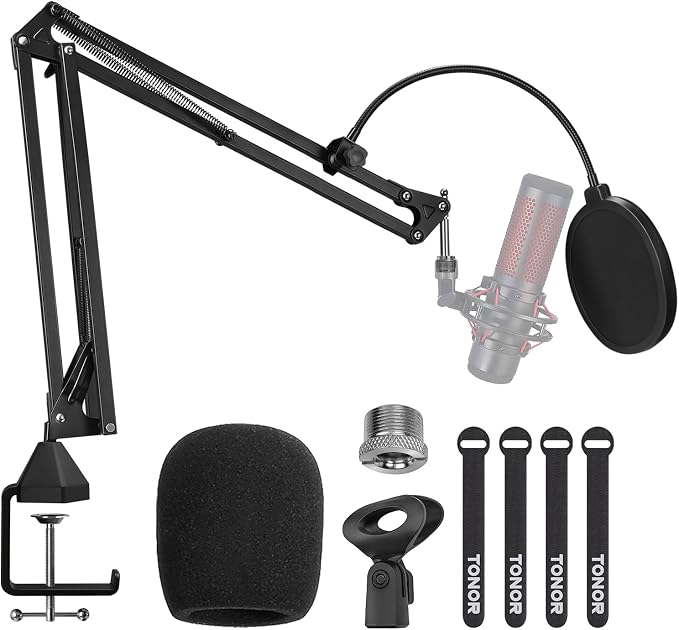
We’d choose the TONOR T20 for a solo podcaster or course creator who already owns a microphone and needs the rest of a basic desk setup. The included accessories cover a mic clip, pop filter, foam windscreen, thread adapter, and cable ties.
The steel arm supports up to 4 pounds and has about 27.6 inches of reach, according to TONOR. The base can turn through a full circle, so you can bring the mic in from the side if the best clamp spot sits off center.
The built in hook gives headphones a place to hang below the desk edge. The filter is useful above the desk, where it can soften hard pops from sounds such as the letter P. TONOR lists the Blue Yeti and HyperX QuadCast among compatible models.
The clamp opening tops out at about 2.4 inches, and the kit comes without a shock mount. If the desk fits, follow the illustrated setup guide to fit the arm into the clamp and secure it with the knob before attaching the mic.
A few things to check
- Your desktop is thicker than 2.4 inches at every usable edge, so the included clamp won’t open wide enough where you need to attach it.
- Your microphone needs a separate shock mount and you’re looking for a single kit with one in the box alongside the pop filter.
- Your only clamp location is more than 27.6 inches from where you need the mic, such as the far edge of a deep desk.
3. Elgato Wave Mic Arm LP
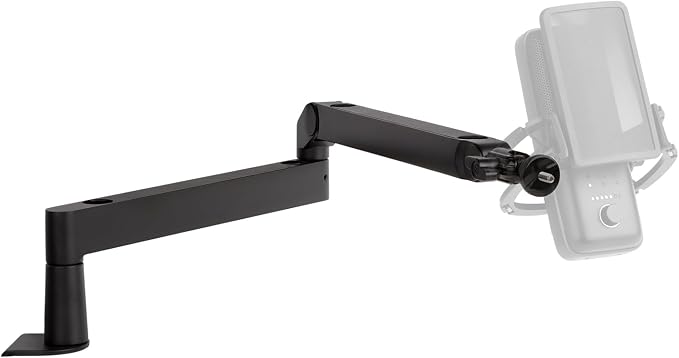
We’d choose the Elgato Wave Mic Arm LP for a video creator or remote presenter who needs a clear view of the screen. Its low profile design runs close to the desk. With enough room beneath the monitor, the arm can approach from below.
The arm has 29.1 inches of reach, and both its base and elbow turn through a full circle horizontally. We’d use those measurements to check whether the arm can come in from the side of the desk and pass behind a keyboard or control pad.
What makes this design especially handy for video is the way it handles the cable. Magnetic channel covers hide the lead along the arm and lift off when you need to change it. The swiveling ball head lets you aim the mic once it’s in position.
A low arm still needs a clear path. The clearance drawings show how high each section sits, so check the space around your monitor stand. Also measure the desk edge for the 2.4 inch clamp and count accessories toward the 4.4 pound load limit.
During setup, Elgato’s first time instructions show how to run the cable through the arm before attaching the mic. Elgato documents two versions of the height adjustment, so follow the step that matches the hardware on your unit when you set the angle.
Who should skip it
- Your monitor stand or desk shelf leaves too little room for the arm to swing along the path you’d need.
- Your desk edge exceeds 2.4 inches or your microphone and accessories together weigh more than the rated 4.4 pounds.
4. RØDE PSA1+ Professional Studio Arm
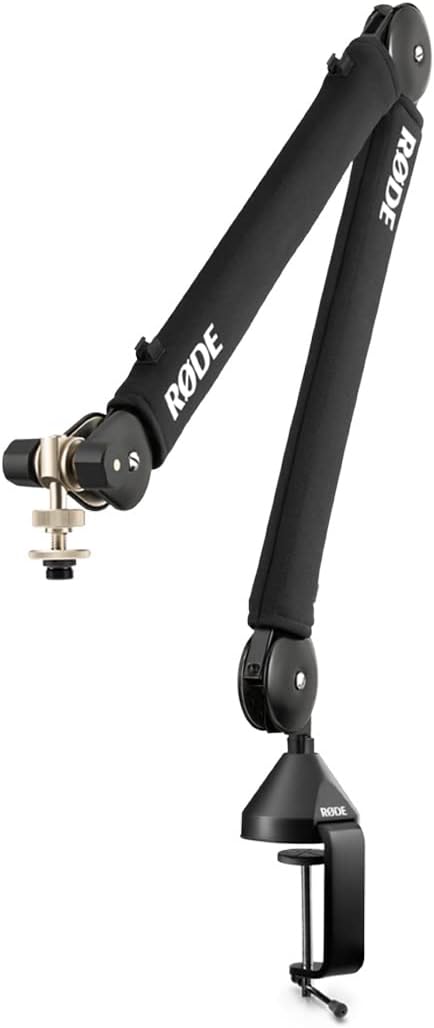
We’d choose the black RØDE PSA1+ for livestream hosts or podcasters who adjust the mic while recording. RØDE uses damped internal springs and a neoprene sleeve to limit mechanical noise from the arm. That design matters most when you need to reposition the mic during a take.
The arm’s 37 inch horizontal reach gives you room to mount it farther from your chair. We’d consider it for a deep desk or a setup with an audio mixer between the clamp and the seat. The arm also routes USB and XLR cables.
RØDE gives you two ways to attach it. The mounting specifications list a desk clamp for surfaces up to 70 millimeters thick and a threaded insert for surfaces up to 55 millimeters. The insert is handy if you’re planning a permanent position away from the desk edge.
Reach is only part of the fit. The supported weight range runs from 94 grams to 1.2 kilograms, or roughly 0.21 to 2.65 pounds, for the mic and attached hardware. Check both ends of that range if you use a very light mic or a heavy mount.
Before opening the arm, read the quick start guide for its spring warning and the steps for your chosen mount. If you prefer to avoid drilling into your desk, start by measuring the clamp location and checking whether it gives you enough reach.
Who should skip it
- Your mic and mounting hardware weigh less than 94 grams or more than 1.2 kilograms when you put them together.
- Your desktop exceeds the clamp’s 70 millimeter opening and you have no suitable place for the included threaded insert.
5. Samson MBA28 Microphone Boom Arm
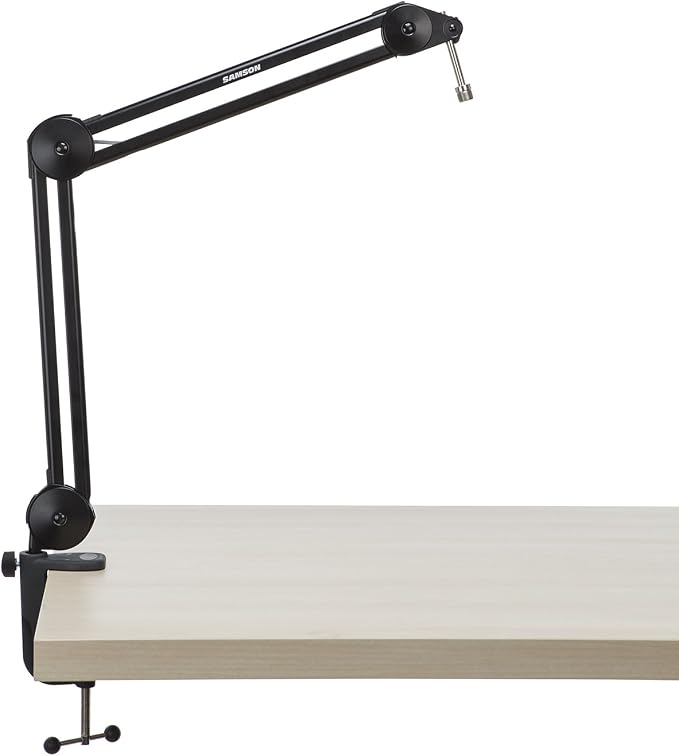
We’d pick the Samson MBA28 for a home studio with a heavier microphone and a mounting spot close to the chair. Its steel arm has a 5 pound capacity and a 28 inch maximum reach. That combination suits a recording station where load matters more than distance.
The two included desk mounts give you a choice between a clamp and a flange that fastens with wood screws. We’d start with the clamp if you rearrange the desk often. The flange makes sense when you’ve settled on a spot for a permanent setup.
Samson puts the springs inside the arm and says they’re intended to keep repositioning quiet. The mic end uses a 5/8 inch thread with 27 threads per inch. If your mic holder uses a different fitting, check which adapter it takes before you order.
The reach is the main limit to check before you settle on a mount. Measure from the actual mounting spot to where the microphone needs to sit. If you’re using the included clamp, measure the desk there as well. Samson specifies a 3 inch maximum opening.
A few things to check
- You have a deep desk and the only spot where you can mount the arm is more than 28 inches from your working mic position.
- Your desktop is thicker than 3 inches where you’d need to clamp it, and a flange fastened with screws won’t work for your desk.
- Your microphone holder uses a different thread and you want it to attach directly to the arm without buying or fitting an additional adapter.
How These Microphone Boom Arms Compare
Use the load ratings and clamp openings to narrow the list before deciding which arm fits the way you work.
| Product | Best for | Maximum load | Maximum clamp opening | Standout feature |
|---|---|---|---|---|
| InnoGear MU01 | Desks shared with office work | 3.3 lb | 2 in | Folds away between sessions |
| TONOR T20 | Solo podcast and course setups | 4 lb | 2.4 in | Pop filter and headset hook |
| Elgato Wave Mic Arm LP | Video setups with low monitors | 4.4 lb | 2.4 in | Low arm with covered cable channels |
| RØDE PSA1+ | Adjusting the mic during recording | 2.65 lb | 2.76 in | Damped springs |
| Samson MBA28 | Heavier mics close to the seat | 5 lb | 3 in | Clamp and screw mounted flange |
Final Thoughts
We’d start with where you want the microphone while you work. Sit in your usual spot, put your keyboard and screens where you use them, and mark a mounting point that leaves room for the arm to move.
Once you know what fits your desk and holds your mic, let your budget and routine guide the choice. Spend on the feature you’ll notice every time you sit down, whether that’s a clear view of your screen or room to swing the mic aside.
Be First to Comment