A clear voice recording can still sound distant when the mic picks up room reflections. For a small business recording training videos, a podcast, or client voiceovers from a home office, that extra room sound can make an otherwise good take harder to use.
Shopping for a shield can add to the frustration. A foam cover, a folding screen, and a framed box can all show up under the same search. Yet each takes up a different amount of space and asks something different of your mic setup.
We researched the market, compared the main shield designs, and selected five options for different ways of recording. Our picks show which setups suit a shared desk, which give you more room to adjust, and which measurements to check before you buy.
How We Selected the Best Microphone Isolation Shields
We compared foam covers, folding screens, and framed boxes using manufacturer pages, current listings, and retailer specifications. We looked at the fit and setup requirements for each model, since a shield that works on a floor stand may be awkward on a desk.
We used recording guidance to put the claims in context. A shield can help manage reflections near the mic. If sound is traveling between rooms, we’d focus on finding a quieter recording spot first.
- Microphone fit: A clear diameter or thread specification helps you check whether your mic and mount will work together.
- Workspace footprint: Think about where the shield will sit and how much room you need for your script, screen, and cables.
- Shield coverage: The shape tells you where the foam sits in relation to the mic.
- Pop control: A front screen is useful when sharp breath bursts interrupt close narration.
- Setup and storage: Folding panels or a cover that slips off can make a shared recording space easier to clear.
- Specification clarity: Consistent measurements help you judge fit before ordering.
Each pick fits a particular recording setup. Start with the one closest to yours.
Best Microphone Isolation Shields for Voice Recording
From a foam cover for quick desk recordings to a framed booth for a regular recording spot, here’s where each pick fits.
1. NEEWER MS012 Microphone Isolation Ball Shield and Pop Filter
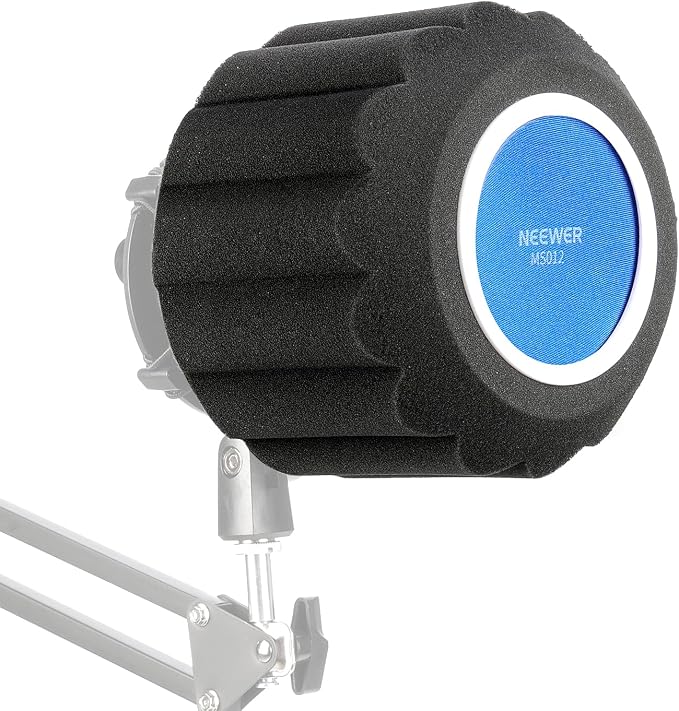
We’d pick the NEEWER MS012 for solo podcasters and business owners who record short voiceovers at a desk they also use for work. The removable cover is handy when the mic stays on its stand between sessions and you want the desk clear.
The five foam layers surround the mic, and a double screen sits across the front. That front screen has a specific job in close narration. It helps break up bursts of air from sounds such as “p” and “b” before they reach the mic.
At about two ounces, the cover is easy to carry between rooms. The listing also describes a removable foam insert. We like that combination for someone who needs a small accessory that can travel with the mic and leave room on the desk for notes.
The tradeoff is fit. The listed diameter range is 43 to 68 mm, so measure the part of your mic the cover will sit on. If the body tapers or has a control where the foam sits, check the shape and clearance too.
The illustrated setup shows the mic going in from below, with the screen reattached last. We’d then record a line with a few hard consonants and compare it with an uncovered take at the same distance and input level.
Who should skip it
- Your mic falls outside the stated fit range, so the cover’s opening is a poor match for your setup.
- You need a screen with stand mounting you can move independently of the microphone while leaving the mic exposed.
2. XTUGA MIS02 Five Panel Recording Microphone Isolation Shield
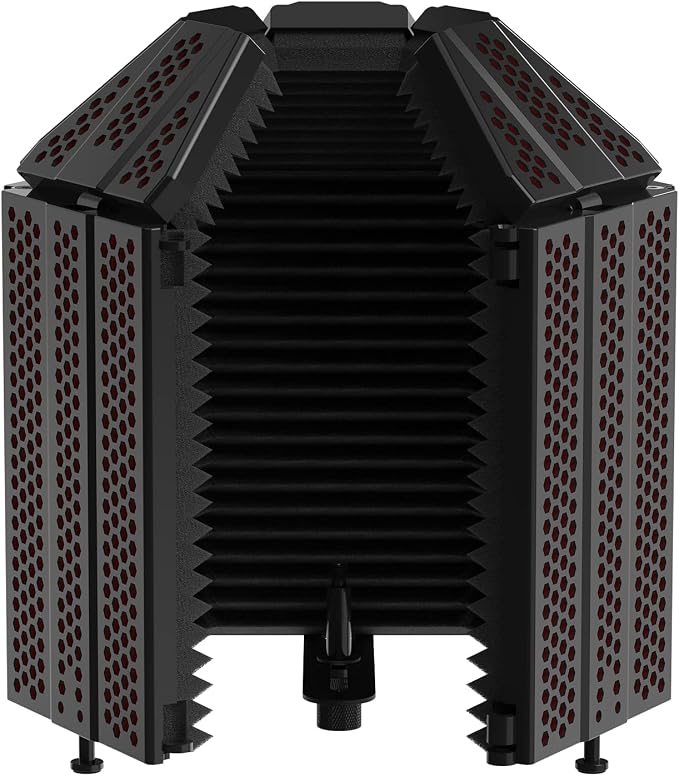
We’d choose the XTUGA MIS02 for a solo narrator who already has a recording stand or a clear tabletop and wants more control over the shape of the shield. The five panel version gives you room to adjust around your mic and script position.
XTUGA pairs a vented plastic shell with a foam lining. The lining puts absorbent material around the back and sides of the mic. The part we find most useful is the folding top, which lets you change the coverage above the mic as well.
The manufacturer’s specifications put the shield at about four pounds. That matters if you plan to attach it to a stand you already own. On a desk, think about how far the panels will open and whether the top will cut into your sightline.
Start with the adjustable sides open enough to see your copy comfortably. Then try bringing them in and changing the top angle, one adjustment at a time. We’d listen to the same line after each change to catch any shift in tone before a take.
Who should skip it
- You have a lightweight mic stand and its rated load leaves little room for a four pound shield alongside your microphone and mounting hardware.
- Your tabletop recording space is so shallow that opening the side panels would take up the space you need for a keyboard, a script, or a screen.
- You record face to face with a guest on one shared mic and need clear access from both sides of the folding shield.
3. Dmsky Microphone Isolation Shield with Pop Filter and Tripod Stand
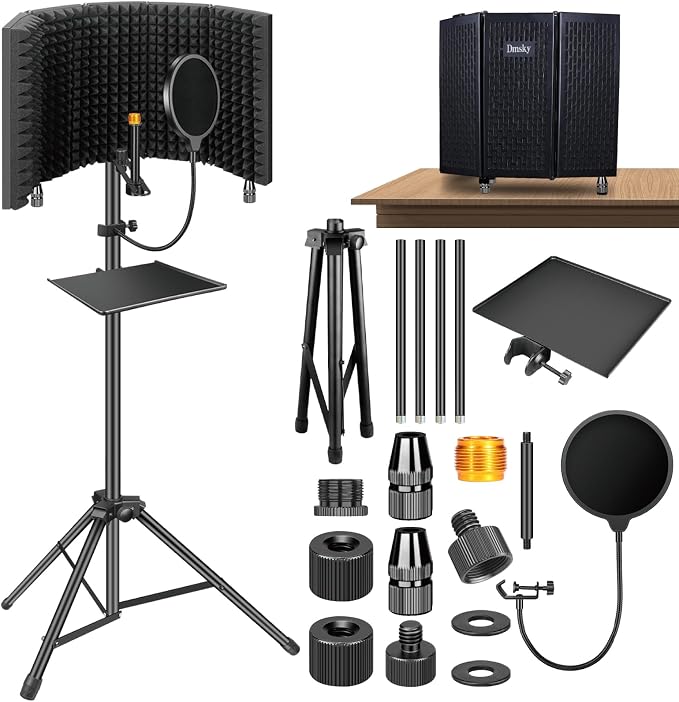
The Dmsky Stand L kit makes sense for a small team setting up its first spot for narration, podcast intros, or course audio. We’d put it on the shortlist when you already have a microphone and want the tripod and pop filter in one kit.
The five folding panels let you vary how far the screen wraps around the microphone. The pop filter sits in front, where it can help with hard consonants. That arrangement is practical when you need to move the filter and shield to suit different speakers.
The steel tripod is the main reason we’d consider this kit for a room with little desk space. The listing also describes a tabletop option for the shield. The included thread adapter covers 3/8 inch and 5/8 inch fittings.
The product listing gives two upper height figures. We’d confirm the usable mic height with the seller before ordering for a tall speaker. For seated takes, check how far the legs would spread around the chair and where the cable would run.
For your first recording, set the adjustable stand at a comfortable speaking height and use the pop screen as a distance reference. We’d note that position if several people record the same script, so the next speaker has an easy starting point.
Who should skip it
- Your recording spot has too little floor space to open the tripod legs clear of chairs and foot traffic.
- You need a verified stand height for a standing speaker and the seller can’t confirm the mic’s usable range.
4. Penypeal Microphone Wind Shield and Isolation Ball
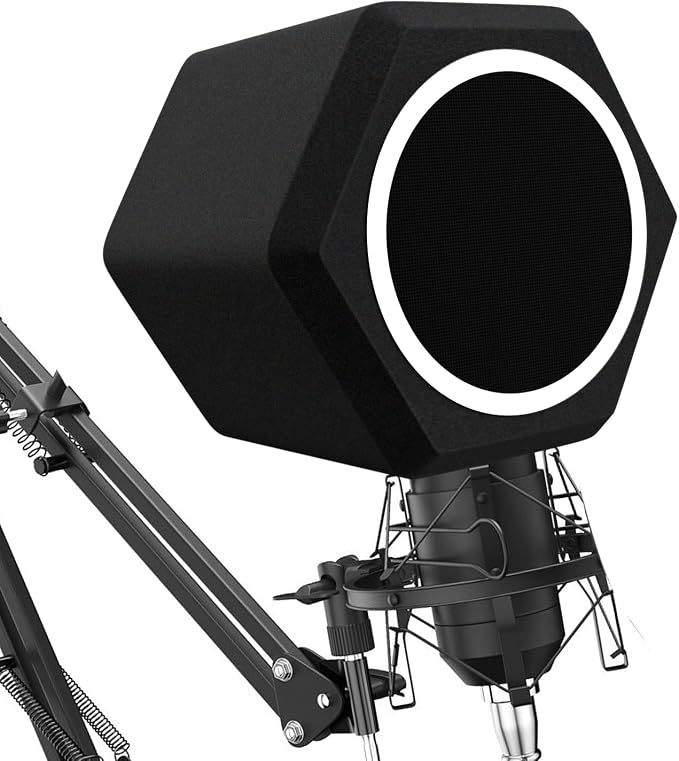
We’d consider the Penypeal isolation ball for recording lessons or podcast intros with a round mic that you move between a desk stand and a boom arm. The cover and front screen give you one small accessory to move along with the microphone.
The foam wraps around five sides of the mic, with a double screen across the speaking opening. The screen is there to soften puffs of breath, which is useful when you record close to the mic and sharp pops are more distracting than room sound.
The US listing puts the weight at 120 grams and describes a removable sleeve and a holder for different mic sizes. We’d check those details first if you share a mic arm between two work areas and want to keep the same accessory with it.
The US listing gives a diameter range of 50 to 75 mm, while another retailer gives 40 to 70 mm for the same item. We’d measure the mic where the sleeve sits and ask the seller to confirm the fit, especially near either limit.
Who should skip it
- Your mic body falls outside the two reported diameter ranges or sits at the edge of one and the seller cannot confirm the fit.
- Your microphone has controls you need to reach during a take and the wraparound foam would sit directly over them once fitted.
- You record interviews across a table and need both sides of the mic exposed. The single front opening is aimed at one speaker at a time.
5. TONOR 24363 Studio Microphone Isolation Shield with Tripod Stand
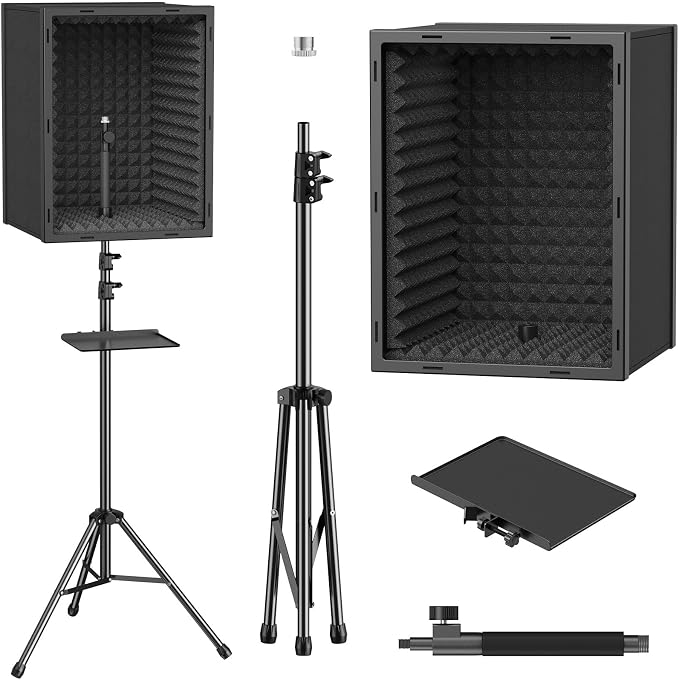
We’d choose the TONOR 24363 for a voice actor, course creator, or small team with a regular recording spot and enough floor space for a tripod. The framed foam box puts the microphone inside a fixed opening for solo takes.
The box design combines five foam and panel sections with rigid plastic frames at the front and back. It gives you a defined space around the mic. For repeat sessions, we’d use that opening as a reference for keeping the microphone in the same position.
The interior dimensions are 12 by 13.6 by 16.7 inches. Measure your setup, including the shock mount and room for the cable to bend. TONOR also lists a mic weight limit of 4.4 pounds and includes a 3/8 inch to 5/8 inch adapter.
The main tradeoff is space. The assembled box is about 15 by 15 by 19.7 inches on the outside, and you’ll need floor space for the tripod. For video, we’d check whether the box would block your script or intrude into the shot.
Use the height adjustment knob to line up the opening with your natural speaking position. We’d confirm the range if height matters to your setup. The US listing’s feature bullets give a 74.8 inch maximum, while another listing for the same model gives 53.1 inches.
Who should skip it
- Your microphone exceeds the listed weight limit, or its mount and cable need more room than the box offers.
- You need a shield for a small desk and have nowhere to spread the floor tripod out safely.
Final Thoughts
We’d start by listening to a plain voice sample from your usual recording spot. A pop screen helps with breath bursts, while room treatment addresses reflections. Knowing which sound bothers you most gives you a clearer reason to buy a shield.
Then think about what your work calls for. A shared desk rewards a setup you can clear quickly, while a regular recording corner gives you room for a stand. Choose what fits your mic, space, budget, and the way you record week after week.
Be First to Comment