A good podcast starts with a voice people can hear clearly, but finding the right microphone is not always straightforward. Some microphones are designed for simple desktop recording, while others offer advanced controls and monitoring features that can make recording much easier.
With so many models promising excellent sound, it is easy to spend money on features you may never use or overlook something important for your setup. Your room, recording style, available desk space, and preferred controls all play a part in finding a microphone that works for you.
We researched the category, compared current manufacturer specifications, and selected five microphones worth considering for different podcasting needs. Our guide explains what makes each option useful, where it falls short, and which types of creators are most likely to benefit, helping you choose with greater confidence.
How We Selected the Best USB Microphones for Podcasting
We started by examining manufacturer documentation and current product specifications, paying particular attention to features that affect everyday recording. Instead of treating every extra feature as a selling point, we focused on what would genuinely help a podcaster record, monitor, and manage their audio.
We also considered how each microphone might fit into a home studio, a busy workspace, or a portable setup. One important distinction is that the Shure MV7+ uses a dynamic capsule rather than a condenser capsule, so we identify it as an alternative for readers who are open to both microphone types.
- Pickup pattern: Directional pickup can help focus on your voice, although good positioning and room acoustics remain important.
- Recording specifications: Sampling rate, bit depth, and connectivity help you understand what the microphone supports and whether it fits your existing equipment.
- Headphone monitoring: A dedicated headphone output lets you listen while recording and catch problems before the session ends.
- Everyday controls: Accessible mute buttons and level adjustments make recording sessions easier to manage.
- Included accessories: A stand, pop filter, and shock mount can simplify your initial setup and reduce the need for additional equipment.
- Room for growth: USB-only designs suit straightforward setups, while models with XLR connections offer more flexibility if you later introduce an audio interface.
Each recommendation serves a different recording style, so the best choice ultimately depends on how you plan to use it. Let’s look at the strengths, limitations, and practical details that matter most.
Best USB Microphones for Podcasting
Whether you’re recording your first episode or improving an established setup, these microphones offer different combinations of simplicity, control, and flexibility.
1. TONOR TC-777 USB Condenser Microphone
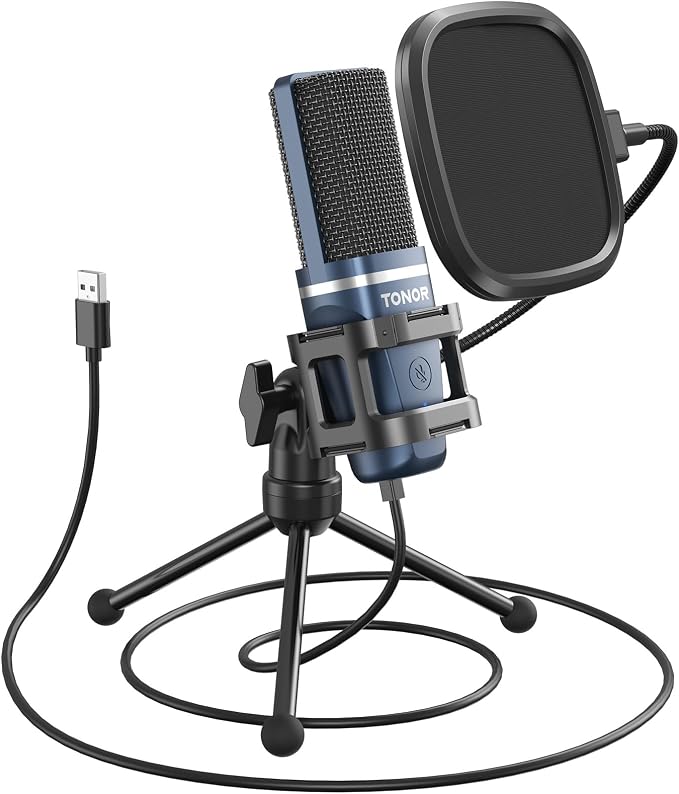
The TONOR TC-777 is a practical starting point for first-time podcasters, students, and solo creators who want a microphone kit without having to purchase several accessories separately. Its cardioid condenser design is intended for recording a speaker positioned in front of the microphone.
Setup is straightforward because TONOR describes it as a USB plug-and-play microphone that does not require a separate driver on compatible computers. The cardioid pattern favors sound coming from the front, which can help keep attention on your voice, although it will not eliminate keyboard clicks or room echo.
One appealing detail is the collection of accessories included in the package. The official product listing identifies a foldable tripod, shock mount, pop filter, cable, and manual, giving beginners the essentials for a basic desktop setup. The mount can also be unscrewed for use with a compatible boom arm.
The TC-777 keeps things simple rather than offering an extensive set of onboard controls. Its manufacturer information does not list a dedicated headphone-monitoring output or physical gain controls, so you’ll generally need to manage listening and recording levels through your computer or recording software.
For a cleaner recording, unfold the stand, position the pop filter between your mouth and the microphone, and keep your speaking distance consistent. Make a short test recording before each session, and consult TONOR’s support guidance if you need help with setup or compatibility.
A few cautions:
- Skip it if direct headphone monitoring is essential to your workflow.
- It is not the most convenient choice for multi-person shows requiring separate microphone tracks.
- TONOR does not list Xbox compatibility, so check your intended platform before purchasing.
2. Samson Meteor Mic USB Condenser Microphone
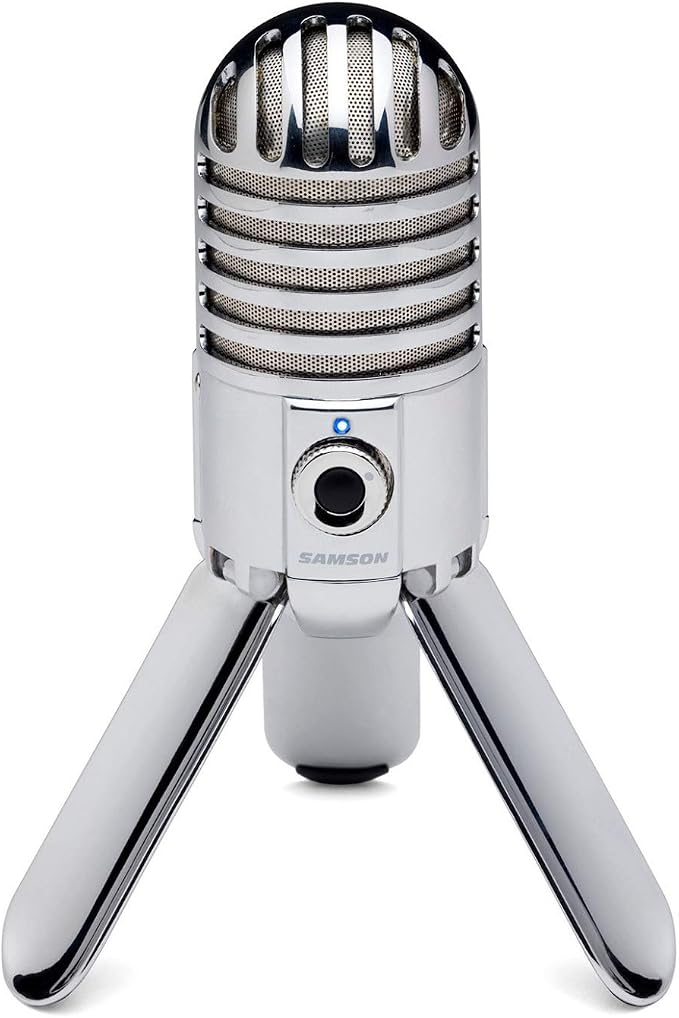
The Samson Meteor Mic is a good fit for solo podcasters who record at a desk but occasionally need to pack their equipment away. Its compact body, chrome-plated finish, and folding tripod legs make it convenient for smaller workspaces and portable recording setups.
Samson’s official specifications list a one-inch condenser capsule, cardioid pickup pattern, and frequency response of 20 Hz to 20 kHz. It records at 16-bit resolution with sampling rates of 44.1 or 48 kHz, providing straightforward specifications for spoken-word podcasts and everyday voice recording.
One particularly useful feature is its headphone output, which supports zero-latency monitoring so you can hear your voice as you record. The manufacturer’s documentation also identifies headphone-volume control and a microphone mute switch, giving you some useful hands-on control without relying entirely on recording software.
The folding legs make it easy to position on a desk, while the built-in stand adapter allows attachment to a compatible boom arm. Samson describes the microphone as a plug-and-play option for USB-equipped computers, making it approachable for beginners who do not want to add a separate audio interface to their setup.
The main compromise is its older 16-bit recording specification, which offers less headroom for some editing workflows than 24-bit alternatives. To get started, unfold the legs, position the microphone in front of you, connect your headphones, and check your input level. A short test recording will help you catch placement or volume problems before the real session.
A few cautions:
- Skip it if you specifically need 24-bit recording for greater flexibility when adjusting levels during post-production.
- It is less suitable for multi-person podcasts where every speaker needs a separate microphone and independently editable track.
- Check the cable and port requirements before buying if your computer only has USB-C ports and you need an adapter.
3. Razer Seiren V3 Mini USB Condenser Microphone
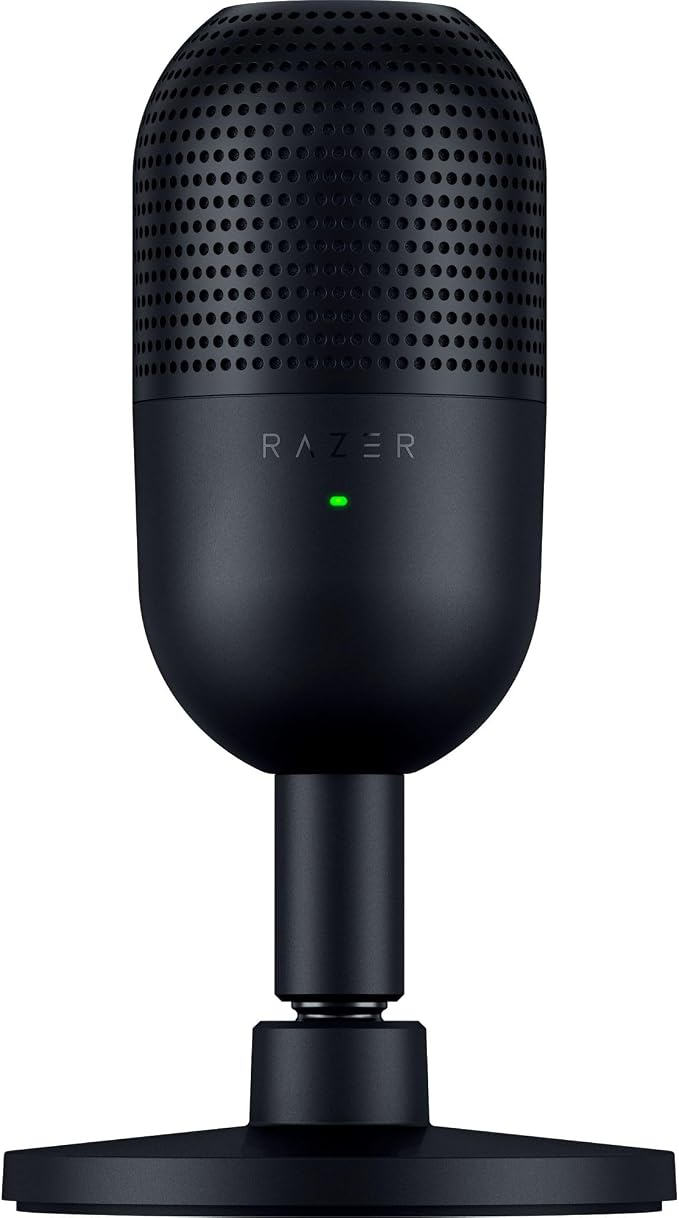
The Razer Seiren V3 Mini is well suited to solo podcasters, streamers, and remote hosts who want a small microphone that leaves plenty of room on their desk. Its compact design is particularly appealing if your workspace already has a keyboard, monitor, and other recording equipment competing for space.
Razer’s published specifications list a 14 mm condenser capsule, supercardioid pickup pattern, 24-bit recording, and sampling rates up to 96 kHz. The supercardioid pattern is designed to favor sound from a narrower direction, although careful positioning is still necessary to keep your voice clear and limit unwanted room noise.
The tap-to-mute sensor is convenient when you need to cough, handle an interruption, or briefly stop transmitting your voice. An LED indicator makes the microphone’s status easier to see, while Razer’s product information describes a tiltable desktop stand with a built-in shock absorber to help reduce some vibrations from desk bumps.
Getting started is simple on a compatible computer because the microphone connects through USB-C. Position it close enough to capture your voice clearly, but keep it away from direct keyboard contact. Before recording a full episode, check that your computer has selected the Seiren V3 Mini as its active input.
Its minimalist design does come with a limitation. Razer’s official specifications do not list a dedicated headphone-monitoring output or physical gain knob, so you will need to make adjustments through compatible software or your computer. That is worth considering if you prefer to control everything directly from the microphone.
A few cautions:
- Skip it if direct headphone monitoring and physical gain adjustments are essential.
- It is less convenient for panel shows unless each participant has an appropriate microphone.
- Do not expect its directional pickup pattern to eliminate echo in a reflective room; placement and room treatment still matter.
4. RØDE NT-USB+ Professional USB Condenser Microphone
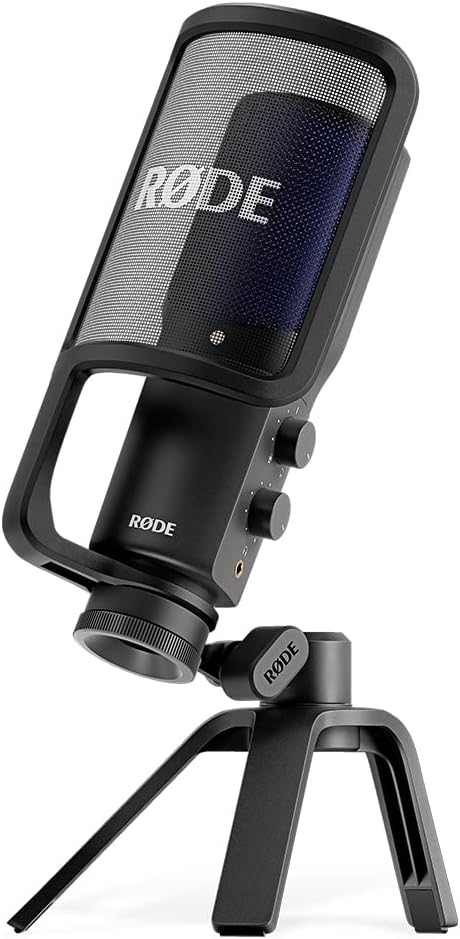
The RØDE NT-USB+ is designed for solo podcasters, interview hosts, and creators who want a more feature-rich USB recording setup. Its condenser capsule and cardioid pickup pattern are intended to capture a speaker positioned in front of the microphone, making it a natural option for spoken-word recording.
RØDE’s official specifications list 24-bit recording at 48 kHz and a USB-C connection. The microphone also features a Revolution preamp and supports digital processing through compatible RØDE software, giving you more control over your recording than a basic USB microphone typically offers.
The software-accessible APHEX processing tools include options such as a compressor, noise gate, high-pass filter, and vocal enhancement features. These digital audio tools can help shape your voice and manage certain unwanted sounds, although they cannot compensate completely for poor microphone placement or a noisy recording environment.
Another advantage is that the NT-USB+ includes a headphone output for zero-latency monitoring. RØDE also lists a pop filter and desktop tripod among the included accessories, which means you can begin with a fairly complete solo recording setup rather than sourcing every component separately.
The main limitation is that this model uses USB connectivity without an XLR output. That works well for a straightforward computer-based podcast, but it offers less flexibility if you plan to build a traditional microphone-and-mixer setup. For best results, connect it through USB-C, fit the pop filter, check your headphone levels, and record a short test before each session.
A few cautions:
- Skip it if you need an XLR output for an audio interface or mixer.
- It is not the most convenient solution for recording several people around one table with individually controlled microphone feeds.
- If you prefer adjusting everything physically, you may not take full advantage of its software-based processing options.
5. Shure MV7+ USB-C and XLR Podcast Microphone
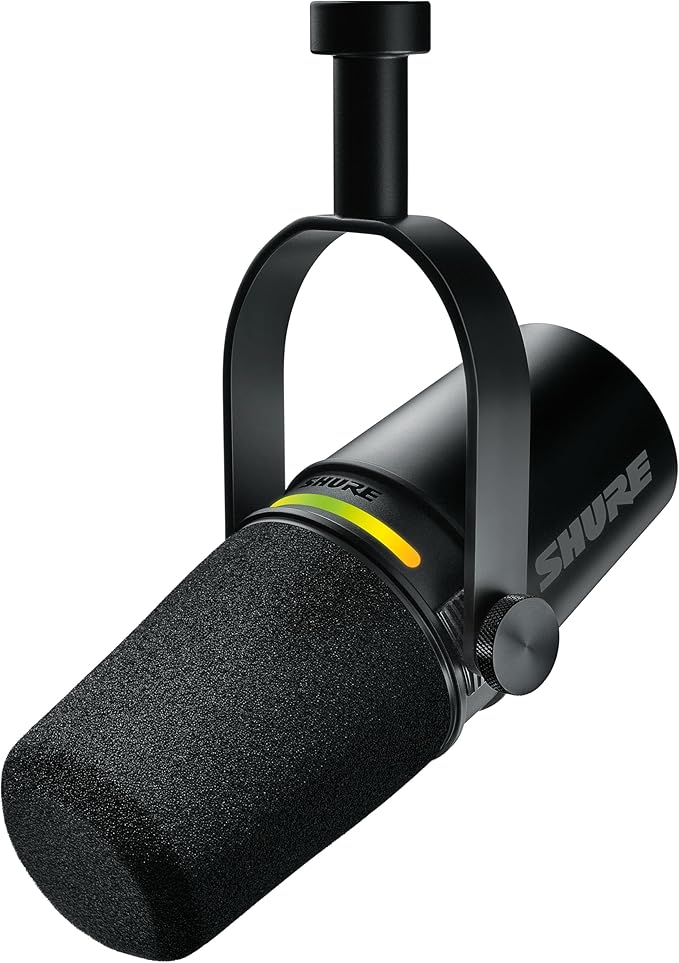
The Shure MV7+ is a strong option for podcasters who record in shared rooms or home environments and want more control over their voice recordings. One important distinction, however, is that the MV7+ uses a dynamic moving-coil capsule, making it an alternative to condenser microphones rather than a condenser model itself.
Its cardioid pickup pattern, voice-isolation processing, and real-time denoiser are designed to prioritize the person speaking close to the microphone. Auto Level Mode can adjust gain as your distance and speaking volume change, which is especially useful if you naturally move around during a recording session.
The MV7+ offers both USB-C and XLR connections, along with a 3.5 mm headphone jack for zero-latency monitoring. Its touch-sensitive LED panel also provides microphone controls, while the official product information explains how its connections can accommodate direct computer recording or a more traditional interface-based setup.
Shure’s MOTIV Mix software provides additional options for adjusting tone and applying processing, including digital pop filtering and compression. The microphone also features a metal housing and adjustable yoke. Before relying on its software features, check the manufacturer’s guide for current compatibility requirements; desktop MOTIV Mix requires Windows 10 or later or macOS 12 or later.
The main trade-off is that dynamic microphones are generally used closer to the speaker, which may take some getting used to if you prefer a condenser positioned farther away. Place the MV7+ near your mouth, fit the windscreen, connect it through USB-C, and make a test recording to check your levels before starting the episode.
A few cautions:
- Skip it if your purchase must be a condenser microphone specifically.
- It may offer more features than you need for simple, occasional desktop recording.
- Check your computer or mobile device against Shure’s current software requirements before depending on its digital processing tools.
Final Thoughts
Choosing a podcast microphone becomes easier when you focus on the features that genuinely support your recording style. Consider pickup pattern, monitoring, physical controls, recording specifications, and included accessories. Remember that even a capable microphone benefits from sensible positioning and a reasonably quiet room.
Think about how many people you record, how much desk space you have, and whether you may eventually add an audio interface. The best choice is the one that fits your actual needs and feels manageable every time you sit down to record. Prioritize practical benefits over an impressive specification list, and build your setup around the conversations you want to share.
Be First to Comment